Showing posts with label Plain Jane Project. Show all posts

Friday, August 23, 2013

Working on Jayne

Renovations
Good morning, dear readers!
 
We are gradually getting back into the swing of homeschooling and I am somehow managing to get in a little bit of tatting time each day.  Plain Jane is slowly being transformed into Lady Jayne, but I had to take a break from her.  There were a couple of design ideas bouncing around in my head that I had to play with.
 
Anyhow, here is a peek at the beginnings of  Lady Jayne:
 
 
This is the center motif with a few bead accents.
 
 
And this is the drop accent that will hang from the center motif.  I may add more beads, according to how the side pieces turn out.  They may be needed to provide more balance to the necklace.
 
 
The above image is of a bracelet prototype that I'm currently designing.  I really love this Valdani Pearl Cotton in color O538 "Cottage Smoke".  It looks great with the Delica beads I'm using and also the pearls I plan to add on another subsequent round.
 
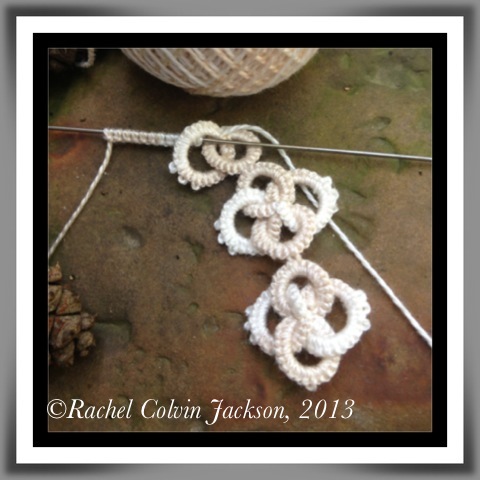
And here is a little pendant motif I'm still playing with:
 
 
It began like this...
 
 
Then grew to this...
 
 
And this is where it is at now.  I sidetracked myself by starting the bracelet prototype!  The bracelet idea popped into my head as I was contemplating the next round for the pendant.  That O538 Valdani pearl cotton was sitting there just begging me to tat something with it, and the bracelet idea popped into my head.  I sketched it out roughly and began tatting.
 
I'm hoping to get back to Jayne this weekend, but it all depends upon how well the bracelet project goes.  For some reason, that is what my hands want to tat.
 
It is also time for another Piney Woods Event, isn't it?!?  I have oodles of vintage buttons and other miscellaneous goodies that may be put into the give away- or do y'all want me to put up a special OOAK piece?  Comment on this post to let me know which you'd prefer or if you think I should do both!
 
Well, Rosie Fey is ready for our morning run.  Guess I had better take care of her and the chickens before starting homeschool for the day.  May you have a wonderful week full of tatting goodness!  Until next Friday~
Happy Tatting!


Friday, August 9, 2013

Meet Plain Jane

Renovations
Good morning, dear readers!
It is my pleasure to introduce you to Plain Jane :
 
 
I have not permanently attached the pieces as I plan to further enhance Plain Jane and turn her into Lady Jayne.  If you wish to complete her as she is, simply attach the pieces with jump rings and add an adjustable chain length with a clasp of your choice to the side pieces.
 
To make things easier to find for those who did not participate in the tat-along, here are all of the steps:
 
 
Using a size 7 tatting needle and a ball of size 8 Valdani Pearl Cotton in M49 "Subtle Elegance", tat 6 ICRs with the following counts:
ICR 11 followed by 5 graduated picots (sm, med, lg, med, sm) 11 CL
ICR 13 very small - 13 CL
Tat 3 of each, alternating for a total of 6 ICRs. Tie, hide ends & cut.
(For a tutorial on needle tatting ICRs, click here.)
 
 
R 11 + (to very small - of previously tatted ICR) 11 CL RW
CH 3 very sm- 3 followed by 3 graduated picots (sm, med, sm) 3 very sm- 3 CL RW
R 11 + (to med - of previously tatted ICR) 11 CL RW
CH 3 very sm- 3 followed by 3 graduated picots (sm, med, sm) 3 very sm- 3 CL RW
R 7 + (to lg - of previously tatted ICR) 7 CL RW
CH 3 very sm- 3 followed by 3 graduated picots (sm, med, sm) 3 very sm- 3 CL RW
R 11 + (to med - of previously tatted ICR) 11 CL RW
CH 3 very sm- 3 followed by 3 graduated picots (sm, med, sm) 3 very sm- 3 CL RW
R 11 + (to very small - of previously tatted ICR) 11 CL RW
You will continue around the motif, joining the final CH to base of first R tatted.  Tie, hide ends & cut.


The above is what Plain Jane will look like after tatting the two interwoven chain rounds.  They both have a stitch count of 23.  Begin by running the needle through the very small picot to the left of the 3 graduated picots of any previously tatted CH.  CH 23 CL + to corresponding very small picot on next previously tatted CH.  Continue around the motif.  Join last CH to the base of the first, tie, hide ends & cut.  This is what it should look like:


To tat the second CHs to interweave, run needle through very small picot on the right of the graduated picot grouping of any previously tatted CH.  Cut off a long length of thread from ball as this is your working thread.  I use a second needle on this end to help weave my work.  CH 23 CL, pull work around previously tatted CH, + to corresponding very small picot to the right of the graduated picot grouping on the next chain.  Pull both threads through and continue around motif.  Join last CH at the base of the first CH.  Tie, hide ends & cut.
 
 
Tat 3 ICRs, all with the counts of :
ICR 13 followed by 3 very small picots 13 CL.
Tie, hide ends & cut.
 
The next step is to tat the 3 rounds of CHs around the ICR foundation.  ALL CHs are the same count.  Run needle through/join at 1st very small picot and CH 31 CL + to next corresponding very small picot. Repeat, tie hide ends and cut.  Do the same for the second and third CH rounds around the ICR foundation, weaving them as you go.


These ICRs will form a chain on each side of the focal point.  You will need 12 for each side.  Of course, each tatter may wish to adjust the number of ICRs to make a necklace to her/his preferred length.  The counts are:
ICR 11 very small- 11 CL
ICR 11 followed by 3 very small -s 11 CL
ICR 11 very small - 11 CL
ICR 11 followed by 3 very small -s 11 CL
Tie, hide ends & cut.
 
For the next ICR motif:
ICR 11 + 11 CL
ICR 11 followed by 3 very small -s 11 CL
ICR 11 very small - 11 CL
ICR 11 followed by 3 very small -s 11 CL
Tie, hide ends & cut.
 
For the last ICR motif:
ICR 11 + 11 CL
ICR 11 followed by 3 very small -s 11 CL
ICR 11 followed by 3 very small -s 11 CL
ICR 11 followed by 3 very small -s 11 CL
Tie, hide ends & cut.
 
 
Begin by running the needle through/joining at the first very small picot of the first ICR motif you tatted.
CH 25 CL + to first very small picot of the next ICR motif.  Continue until you reach the last ICR motif and CH 19 CL + to first very small picot on next R of last ICR motif, CH 19 CL + to first very small picot on the next R of same ICR, then revert back to the CH 25 CL + until you reach then end of the piece.
Now, you will repeat this 2 more times on each side piece, weaving the chains as you go.
 
Okay, I hope I covered all the steps.  If I missed something, sorry.  It was a long night and I'm still half asleep trying to get Jim off to work.  Be sure to check out Monday's post for info on the blog changes I'm making.  May you have a marvelous weekend full of creativity and tatting goodness!  Until Monday~
Happy Tatting!


Thursday, August 8, 2013

Big Changes Coming To Blog

Renovations
Good morning, dear readers!
Jim has finally arranged things somewhat to his satisfaction.  As an engineer, he is always figuring out new things with new technologies he wants to "upgrade" our system with.  At least he is going to leave things alone for a bit!
 
I have been doing some serious thinking and researching this week.  August 29th will be the 2nd anniversary of this blog.  I have blogged pretty much every weekday with the rare exception of technical difficulties or other family emergencies.  While I have enjoyed blogging on a daily basis, there are some things that must change as our family situation requires it.  I will post the new arrangement and changes to Monday's blog post.
 
Tomorrow will be the debut of the completed Plain Jane Project.  Hope you have enjoyed the tat-along!
 
Well, I have much to do today- including taking images of Plain Jane.  Hope your day is full of creativity & until tomorrow~
Happy Tatting!


Monday, August 5, 2013

Serious Tech Upgrades

Renovations
Good morning, dear readers!
Well, we sort of have our tech issues resolved.  It seems that we had an unexpected power surge that took out our wireless router, cable modem and insulated surge protector.  Fortunately, the laptop & desktop computers are on different surge protected circuits.  They were unaffected. The router and modem have been replaced, but Jim is still working on setting up our home network to his exact specifications.  What a blessing it is that my husband is an electrical engineer!
 
I am taking the next few days to help him get our home network set up and everything connected and protected as well as organizing my thread, bead and vintage items.  The Plain Jane Project will be revealed later this week as we really need several days to get things squared away and back to our liking.  Sorry for the delay, but unexpected things sometimes happen.
 
The blog theme for this month is "Renovations".  I plan to rework my favorite tatting areas in the house, Atelier and tatting shanty.  I'll let you know about some of the neat storage and decorative goodies I find and throw in a few peeks at some of the pieces in my upcoming Olde West Collection and a few new additions to the Romance of the Piney Woods Collection.
 
Rosie Fey is giving me the "look".  I had better take her out and get on with my day.  This is my antique/vintage button sorting day.  Hope your day is wonderful and full of joy.  Until tomorrow~
Happy Tatting!


Thursday, August 1, 2013

Back Home

Olde West Inspiration
Good morning, dear readers!
 
I'm back home and plan to have a productive day in the Atelier finishing up the Plain Jane Project.  She may be ready for unveiling tomorrow IF all goes well.  Let's hope my tatting mojo is flowing.
 
The blog theme for August will be announced tomorrow, too.  Sheesh!  I have so much to accomplish today.  Guess I'd better hop to it.  Have a great day & until tomorrow~
Happy Tatting!


Wednesday, July 31, 2013

Plain Jane Side Pieces Accent Round

Olde West Inspiration
Good morning, dear readers!
 
Here are the counts for the chain accents on the side pieces:
 
 
You will be repeating these counts three times and weaving as you go.
 
 
Begin by running the needle through/joining at the first very small picot of the first ICR motif you tatted.
CH 25 CL + to first very small picot of the next ICR motif.  Continue until you reach the last ICR motif and CH 19 CL + to first very small picot on next R of last ICR motif, CH 19 CL + to first very small picot on the next R of same ICR, then revert back to the CH 25 CL + until you reach then end of the piece.
 
 
Now, all you need to do is go back and repeat it twice on the next very small picot until you have a series of three interwoven chains to accent the side pieces.
 
Well, dear readers, I have a couple of appointments today, so my tatting time will be VERY limited.  I will try to get both side pieces complete and posted for Thursday's blog entry.  Hopefully, I will be able to get Plain Jane transformed into Lady Jayne next week.
 
Hope you are enjoying the project.  Have fun & until tomorrow~
Happy Tatting!


Tuesday, July 30, 2013

Slight Change to Side Pieces Design

Olde West Inspiration
Good morning, dear readers!
Yesterday was full of "catching up chores"- a grocery store run, laundry, and a general cleaning of the Atelier.  I did finish both of the side pieces for the Plain Jane Project and have made a slight change- but only to the last of the ICRs that you will be joining together as you tat.
 
 
(Sorry the image is so bad.  It is overcast this morning and I had to use a flash.)
 
To form the side pieces, you will need to tat a series of 12 ICR motifs joined together with the following counts:
ICR 11 very small- 11 CL
ICR 11 followed by 3 very small -s 11 CL
ICR 11 very small - 11 CL
ICR 11 followed by 3 very small -s 11 CL
Tie, hide ends & cut.
 
For the next ICR motif:
ICR 11 + 11 CL
ICR 11 followed by 3 very small -s 11 CL
ICR 11 very small - 11 CL
ICR 11 followed by 3 very small -s 11 CL
Tie, hide ends & cut.
 
When you reach the 12th ICR motif, tat with these counts:
 
ICR 11 + 11 CL
ICR 11 followed by 3 very small -s 11 CL
ICR 11 followed by 3 very small - 11 CL
ICR 11 followed by 3 very small -s 11 CL
Tie, hide ends & cut.
 
How are things tatting up for y'all?  Are you ready for the next step on the side pieces?  I'll be perfecting the counts for them today after I return from running errands and having lunch with a very dear uncle.  R.D. and I share the same birthday and first two initials.  He is 88 this year!
 
Well, Rosie Fey is spinning at the door.  Guess I had better take her out and get moving.  It's going to be a busy day in the Piney Woods again.  Until tomorrow~
Happy Tatting!


Monday, July 29, 2013

Birthday Weekend Highlights

Olde West Inspiration
Good morning, dear readers!
I had a very pleasant birthday this year.  Jim and Jocie totally surprised me with a full weekend of Jeep off-roading adventures.  I had a blast, but am very tired.  Unfortunately, I got precious little tatting done.  After a quick trip to the grocery store for necessities, I plan to tat the day away in the Atelier.  The next step of the Plain Jane Project will be up early tomorrow morning.  Until then~
Happy Tatting!
  

Friday, July 26, 2013

Plain Jane Project Side Pieces

Olde West Inspiration
Good morning, dear readers!
I have a confession- yesterday was VERY productive in the Atelier.  Three new OOAK design prototypes worked out exactly as I had them in my head & I started making them with Valdani Luxury Pearl Silk.  The bad news is I did not get as far with the next step in the Plain Jane Project as I had planned.  Sorry about that, but the creative juices were flowing and I could not afford to ignore the ideas in my head.
 
Now, if you wish, you may attach the accent drop featured yesterday on the main focal piece of the Plain Jane Project and be done with it- OR if you wish, continue with me on this tat-along as Plain Jane will be transformed into a necklace.  After I finish designing and posting Plain Jane, I plan to transform her into Lady Jayne!  Then you, dear readers, can do the same with your own ideas and such.
 
Anyway, this is how I am starting the two side pieces:
 
 
These ICRs will form a chain on each side of the focal point.  I'm not sure how many for each side yet, but will post the exact number on Monday.  Of course, each tatter may wish to adjust the number of ICRs to make a necklace to her/his preferred length.  The counts are:
ICR 11 very small- 11 CL
ICR 11 followed by 3 very small -s 11 CL
ICR 11 very small - 11 CL
ICR 11 followed by 3 very small -s 11 CL
Tie, hide ends & cut.
 
For the next ICR motif:
ICR 11 + 11 CL
ICR 11 followed by 3 very small -s 11 CL
ICR 11 very small - 11 CL
ICR 11 followed by 3 very small -s 11 CL
Tie, hide ends & cut.
 
Continue with these counts until you have two side pieces that are the length you require.  I will be posting more specific details and instructions on Monday.
 
Well, I have more work to do on Plain Jane and those OOAK pieces are still calling me.  May you all have a fabulous weekend full of creativity!  Until Monday~
Happy Tatting!


Thursday, July 25, 2013

Plain Jane Accent

Olde West Inspiration
Good morning, dear readers!
  The main focal piece of the Plain Jane Project is now complete.  Today we will be tatting the accent piece for the project:
 
 
The accent consists of an ICR foundation and 3 interwoven chains around it.
 
 
Tat 3 ICRs, all with the counts of :
ICR 13 followed by 3 very small picots 13 CL.
Tie, hide ends & cut.
 
The next step is to tat the 3 rounds of CHs around the ICR foundation.  ALL CHs are the same count.  Run needle through/join at 1st very small picot and CH 31 CL + to next corresponding very small picot. Repeat, tie hide ends and cut.  Do the same for the second and third CH rounds around the ICR foundation, weaving them as you go.
 
At this point, you may use the piece as an applique or attach the accent piece to the focal piece with a jump ring or additional tatting.  Tomorrow, I will post the last step of the Plain Jane Project.  I sincerely hope that y'all are enjoying this tat-along.  It has been fun to put it together this week in between putting up our harvest from the garden.
 
Speaking of the garden, I need to go pick tomatoes, speckled butter beans and okra before it gets too hot outside.  Hope you have a wonderful day and be sure to check out the blog tomorrow for the final bit of the Plain Jane Project.  Until then~
Happy Tatting!


Wednesday, July 24, 2013

Plain Jane, Round Two

Olde West Inspiration
Good morning, dear readers!  How are you all coming along with the Plain Jane Project?  Are you ready for the next steps?  Here they are:
 
 
This is what Plain Jane will look like after tatting the two interwoven chain rounds.  They both have a stitch count of 23.  Begin by running the needle through the very small picot to the left of the 3 graduated picots of any previously tatted CH.  CH 23 CL + to corresponding very small picot on next previously tatted CH.  Continue around the motif.  Join last CH to the base of the first, tie, hide ends & cut.  This is what it should look like:
 
 
To tat the second CHs to interweave, run needle through very small picot on the right of the graduated picot grouping of any previously tatted CH.  Cut off a long length of thread from ball as this is your working thread.  I use a second needle on this end to help weave my work.  CH 23 CL, pull work around previously tatted CH, + to corresponding very small picot to the right of the graduated picot grouping on the next chain.  Pull both threads through and continue around motif.  Join last CH at the base of the first CH.  Tie, hide ends & cut.
 
If you wish, you can use this as a simple pendant or applique, but I have more planned for this project.  Check out tomorrow's post for the next step!  I really am loving how this Valdani Pearl Cotton is tatting up.  M49 is one of my favorite colors.
 
Rosie Fey is ready for our run in the woods.  Guess I'll take her out for that after I get Jim off to work.  Have a great day & until tomorrow~
Happy Tatting!


Tuesday, July 23, 2013

Plain Jane, Round One

Olde West Inspiration
Good morning, dear readers!
Jim had to go into work early, so I decided to get the next step in the Plain Jane Project posted.
 
 
R 11 + (to very small - of previously tatted ICR) 11 CL RW
CH 3 very sm- 3 followed by 3 graduated picots (sm, med, sm) 3 very sm- 3 CL RW
R 11 + (to med - of previously tatted ICR) 11 CL RW
CH 3 very sm- 3 followed by 3 graduated picots (sm, med, sm) 3 very sm- 3 CL RW
R 7 + (to lg - of previously tatted ICR) 7 CL RW
CH 3 very sm- 3 followed by 3 graduated picots (sm, med, sm) 3 very sm- 3 CL RW
R 11 + (to med - of previously tatted ICR) 11 CL RW
CH 3 very sm- 3 followed by 3 graduated picots (sm, med, sm) 3 very sm- 3 CL RW
R 11 + (to very small - of previously tatted ICR) 11 CL RW
You will continue around the motif, joining the final CH to base of first R tatted.  Tie, hide ends & cut.
 
Well, I had better get busy with the laundry and housework I've been neglecting.  I plan to have some serious Atelier time after the chores are done.  Hope your day is fantastic!  Until tomorrow~
Happy Tatting!